2008年6月4日 星期三

Squid - 掛卸快扣的工具

Squid - 掛卸快扣的工具

它是一種改良式的 Stick Clip (註),不止可以協助先鋒攀登者優雅地在伸手不可及的耳片上掛上快扣,也可以用來卸下快扣,甚至也可用在快扣上掛繩.

註: Stick Clip 請參考 戶外先鋒攀登十項必備物品

Climbing Gear - Squid


Squid - 操作示範

2008年6月2日 星期一

美軍山訓手冊(2002) - FM 3-97.61 Military Mountaineering

美軍山訓手冊 - Military Mountaineering

Military Mountaineering
Field Manual No. 3-97.61

Headquarters
Department of the Army
Washington, DC, 26 August 2002

Table of Contents

COVER
PREFACE
CHAPTER 1. MOUNTAIN TERRAIN, WEATHER, AND HAZARDS
Section I. Mountain Terrain
1-1. Definition
1-2. Composition
1-3. Rock and Slope Types
1-4. Rock Classifications
1-5. Mountain Building
1-6. Route Classification
1-7. Cross-Country Movement
1-8. Cover and Concealment
1-9. Observation
1-10. Fields of Fire
Section II. Mountain Weather
1-11. Considerations for Planning
1-12. Mountain Air
1-13. Weather Characteristics
1-14. Wind
1-15. Humidity
1-16. Cloud Formation
1-17. Types of Clouds
1-18. Fronts
1-19. Temperature
1-20. Weather Forecasting
1-21. Recording Data
Section III. Mountain Hazards
1-22. Subjective Hazards
1-23. Objective Hazards
1-24. Weather Hazards
1-25. Avalanche Hazards
CHAPTER 2. MOUNTAIN LIVING
Section I. Survival
2-1. Water Supply
2-2. Nutrition
2-3. Personal Hygiene and Sanitation
Section II. Acclimatization and Conditioning
2-4. Symptoms and Adjustments
2-5. Physical and Psychological Conditioning
Section III. Medical Considerations
2-6. Illness and Injury
2-7. Treatment and Evacuation
2-8. Solar Injuries
2-9. Cold-Weather Injuries
2-10. Heat Injuries
2-11. Acute Mountain Sickness
2-12. Chronic Mountain Sickness
2-13. Understanding High-Altitude Illnesses
2-14. High-Altitude Pulmonary Edema
2-15. High-Altitude Cerebral Edema
2-16. Hydration in HAPE and HACE
CHAPTER 3. MOUNTAINEERING EQUIPMENT
Section I. Equipment Description and Maintenance
3-1. Footwear
3-2. Clothing
3-3. Climbing Software
3-4. Climbing Hardware
3-5. Snow and Ice Climbing Hardware
3-6. Sustainability Equipment
Section II. Equipment Packing
3-7. Choice of Equipment
3-8. Tips on Packing
CHAPTER 4. ROPE MANAGEMENT AND KNOTS
Section I. Preparation, Care and Maintenance, Inspection, Terminology
4-1. Preparation
4-2. Care and Maintenance
4-3. Inspection
4-4. Terminology
Section II. Coiling, Carrying, Throwing
4-5. Coiling and Carrying the Rope
4-6. Throwing the Rope
Section III. Knots
4-7. Square Knot
4-8. Fisherman's Knot
4-9. Double Fisherman's Knot
4-10. Figure-Eight Bend
4-11 Water Knot
4-12. Bowline
4-13. Round Turn and Two Half Hitches
4-14. Figure-Eight Retrace (Rerouted Figure-Eight)
4-15. Clove Hitch
4-16. Wireman's Knot
4-17. Directional Figure-Eight
4-18. Bowline-on-a-Bight (Two-Loop Bowline)
4-19. Two-Loop Figure-Eight
4-20. Figure-Eight Loop (Figure-Eight-on-a-Bight)
4-21. Prusik Knot
4-22. Bachman Knot
4-23. Bowline-on-a-Coil
4-24. Three-Loop Bowline
4-25. Figure-Eight Slip Knot
4-26. Transport Knot (Overhand Slip Knot/Mule Knot)
4-27. Kleimhiest Knot
4-28. Frost Knot
4-29. Girth Hitch
4-30. Munter Hitch
4-31. Rappel Seat
4-32. Guarde Knot
CHAPTER 5. ANCHORS
Section I. Natural Anchors
5-1. Trees
5-2. Boulders
5-3. Chockstones
5-4. Rock Projections
5-5. Tunnels and Arches
5-6. Bushes and Shrubs
5-7. Slinging Techniques
Section II. Anchoring With the Rope
5-8. Rope Anchor
5-9. Tensionless Anchor
Section III. Artificial Anchors
5-10. Deadman
5-11. Pitons
5-12. Chocks
5-13. Spring-Loaded Camming Device
5-14. Bolts
5-15. Equalizing Anchors
CHAPTER 6. CLIMBING
Section I. Climbing Fundamentals
6-1. Route Selection
6-2. Terrain Selection for Training
6-3. Preparation
6-4. Spotting
6-5. Climbing Technique
6-6. Safety Precautions
6-7. Margin of Safety
Section II. Use of Holds
6-8. Climbing With the Feet
6-9. Using the Hands
6-10. Combination Techniques
Section III. Roped Climbing
6-11. Tying-in to the Climbing Rope
6-12. Presewn Harnesses
6-13. Improvised Harnesses
Section IV. Belay Techniques
6-14. Procedure for Managing the Rope
6-15. Choosing a Belay Technique
6-16. Establishing a Belay
6-17. Setting Up a Belay
6-18. Top-Rope Belay
Section V. Climbing Commands
6-19. Verbal Commands
6-20. Rope Tug Commands
Section VI. Roped Climbing Methods
6-21. Top-Roped Climbing
6-22. Lead Climbing
6-23. Aid Climbing
6-24. Three-Man Climbing Team
CHAPTER 7. ROPE INSTALLATIONS
Section I. Fixed Rope
7-1. Installation
7-2. Utilization
7-3. Retrieval
7-4. Fixed Rope With Intermediate Anchors
Section II. Rappelling
7-5. Selection of a Rappel Point
7-6. Installation of the Rappel Point
7-7. Operation of the Rappel Point
7-8. Recovery of the Rappel Point
7-9. Types of Rappels
Section III. One-Rope Bridge
7-10. Site Selection
7-11. Installation Using Transport Tightening System
7-12. Installation Using Z-Pulley Tightening System
7-13. Utilization
7-14. Hauling Line
7-15. Retrieval
Section IV. Suspension Traverse
7-16. Site Selection
7-17. Installation
7-18. Retrieval
Section V. Vertical Hauling Line
7-19. Site Selection
7-20. Installation
7-21. Retrieval
Section VI. Simple Raising Systems
7-22. Z-Pulley System
7-23. U-Pulley System
CHAPTER 8. MOUNTAIN WALKING TECHNIQUES
8-1. Basic Principles
8-2. Techniques
8-3. Safety Considerations
8-4. Navigation
8-5. Route Planning
8-6. Route Selection
CHAPTER 9 MOUNTAIN STREAM CROSSING
9-1. Reconnaissance
9-2. Preparation of Troops and Equipment
9-3. Individual Crossings
9-4. Team Crossing
9-5. Rope Installations
9-6. Safety
9-7. Swimming
CHAPTER 10. MOVEMENT OVER SNOW AND ICE
10-1. Movement Over Snow
10-2. Movement Over Ice
10-3. Use of Ice Ax and Crampons
10-4. Glissading
10-5. Snow and Ice Anchors
10-6. Roped Climbing on Ice and Snow
10-7. Movement on Glaciers
10-8. Glacier Bivouac Procedures
CHAPTER 11. MOUNTAIN RESCUE AND EVACUATION
11-1. Considerations
11-2. Planning Rescue Operations
11-3. Mass Casualties
11-4. Special Training
11-5. Preparation for Evacuation
11-6. Manual Carries
11-7. Litters
11-8. Rescue Systems
11-9. Low-Angle Evacuation
11-10. High-Angle Evacuation
APPENDIX A. LEVELS OF MILITARY MOUNTAINEERING
APPENDIX B. MEASUREMENT CONVERSION FACTORS
APPENDIX C. AVALANCHE SEARCH AND RESCUE TECHNIQUES
GLOSSARY
REFERENCES
AUTHENTICATION
Distribution Restriction: Approved for public release; distribution is unlimited.

*This publication supersedes TC 90-6-1, 26 April 1989.


攀岩確保系統 - Climbing Anchor

Climbing Anchor

Source: www.spadout.com

Climbing anchors are a collection of protection (bolts and / or trad gear) which are equalized and redundant.  Climbing Anchors are built to protect the leader when belaying a second or to use as a top rope anchor.
Contents
What is the correct way to setup a climbing anchor?

One of the complications about explaining how to setup climbing anchors is that every anchor is unique. The available protection, direction of protection, what gear you have left (now that you have led a pitch), and your requirements (depending whether it is a top rope anchor or you will be leading above it) all affect how you build your anchor.


Therefore, developing a 'box of tricks' and understanding a variety of anchor building techniques is key.


SARENE


SARENE is a good rule of thumb for building anchors. SARENE stands for Solid Anchors, Redundancy, Equalization and No Extension.


Solid Anchors


'Solid anchors' means that anchors must be 'bomb-proof'. Make sure you place solid protection that is multi-directional. The anchor cannot 'pop-out' if the belayer is pulled up due to a leader fall. Make sure the protection is placed in solid rock that will not break or 'flex' under pressure.


Redundancy


Always design your anchors so that it will still hold if one (or two) pieces of protection fail. Most anchors are built with three or more pieces of protection. Anchors should be constructed so that they will hold even if one piece of protection fails or one piece of webbing / cordlette is cut.


There are a few exceptions to the concept of using three pieces of protection. Two quality bolts are considered safe in many climbing areas. A large live tree, 12 inches in diameter or greater, is also considered safe in many areas. When using trees girth hitch a tied runner (made by tying webbing with a water knot) to the base of the tree. Always girth hitch the tied runner to the lowest part of the tree (to reduce leverage).


Equalization


Make sure that every piece of protection receives the same amount of force.


Cordlette


An easy way to equalize forces is to use a cord-o-lette (a 20ft piece of cordlette tied in a loop using a double fisherman's knot). Full details: Cordlette.


 The Sliding X


The sliding X is an auto-equalizing system that will equalize if you shift your body weight. The Sliding X is created between two pieces of protection using cordlette or webbing. (Note: The following diagrams only show one carabiner for clarity. Always use two carabiners for redundancy.)


The most important element of the sliding X is the 'twist' which is added when setting up the sliding X.

The 'twist' is created by taking one side of the webbing (or cordlette and twisting it 180 degrees creating a loop. Then clip the biners through the loop and the other side.

The importance of this twist is illustrated below.

American Triangle

The above image is incorrect and deadly.

If you leave out the twist and one side of the anchor fails, the biner will slide down the webbing (or cordlette) and fall off the end of the webbing (resulting in complete failure). The twist places the biners through the center of the cordlette therefore prohibiting the biners from completely failing. Though complete failure will not occur (presuming the remaining piece of protection does not fail), the anchor will be extended.
Advantages
  • Auto-equalization and dynamic 
  • Fast setup 
  • Minimal gear requirements (a double length runner will do the job) 
Disadvantages
  • - Extension will occur if one side fails. 
  • - You have to setup multiple 'Sliding X's if you want to use more than two pieces of protection. 

Sliding X with Minimal Extension


Advantages
  • Minimal gear requirements (a double length runner will do the job)
  • Reduces extension (compared to standard sliding X).
Disadvantages
  • You have to setup multiple 'Sliding X's if you want to use more then two pieces of protection.
  • The dynamic equalization properties of the 'Sliding X' are removed.
No Extension

No extension means that if one piece of your anchor fails your anchor will not be 'extended'.

An easy example is the Sliding X. If one side of the 'Sliding X' fails the biners will be dropped 1/2 the length of the cordlette until the biners will be 'caught' again. The acceleration will increase forces on the remaining portion of the anchor (Force = Mass * Acceleration). This increases the risk of the remaining gear failing.

 The importance of Angles when setting up anchors


To minimize force, minimize angles. When equalizing two pieces of protection, use angles below 60 degrees.

The graph shows the weight distribution for any given angle. 20 degrees or less distributes 50% of the force to each piece of protection. 60 degrees distributes 58 percent of the force to each piece of protection. 90 degrees distributes 71 percent of the force to each piece of protection. 120 degrees distributes 100 percent of the force to each piece of protection.

Angles greater than 90 degrees create dangerously high forces.

Force on each piece of protection = (total force)/[2 cos(q/2)]

Multidirectional Anchors

Though 'SARENE' is a good reference when setting up an anchor there are many other issues to consider. When you are climbing multipitch climbs (climbs longer than one pitch) you have to consider upward as well as downward forces on the anchor. Upward forces on the anchor are created when the leader falls and has placed in one or more pieces of protection on lead.

Considering upward forces is especially important when using Passive Protection passive or natural protection. Natural protection is when you sling horns or other natural rock formation. Though slinged horns can create excellent downward protection, they risk being pulled out of place if the belayer is pulled up. Passive protection is typically only suitable to protect one direction.

The solution is to place protection below the anchor designed to protect against upward movement. Attach this piece to the anchor. Active protection are often multidirectional by themselves and will not necessarily require an upward directional.

Redirecting the Second


A popular means of belaying the second while climbing is to belay off your harness. When you belay off your harness and the second weights the rope the weight will pull straight down on your harness.

This can be very uncomfortable and difficult to hold. Redirecting this weight is worth a few seconds of your time.


When belaying the second from your harness place a carabiner on a solid piece of protection (a piece from your anchor is fine). Run the rope from the second, through the biner and then to your belay device. If the second falls a low upward force will be created (similar to belaying a climber on top rope).

2008年6月1日 星期日

基礎墜落 - The Basics of Falling

基礎墜落 - The Basics of Falling


Author: Arno Ilgner
Illustration: Mike Clelland
Source: Climbing Magazine

譯者: nin(版主) - 台灣攀岩資料庫
譯文摘自: 綜合攀岩技術討論 - 台灣攀岩資料庫
日期: 01/29/2005


墜落本來就是攀岩過程中一定會發生的事了。可能是把手點斷了,腳滑了,手沒力了,然後咻,離開岩壁。所以說認識適當的墜落方法並練習墜落是很重要的,因為我們是要安全地墜落而不只是墜落。

先接受再說
不管什麼原因,只要墜落,我們就有可能受傷或死掉。先預想一切可能的後果,總會讓人比較容易處理事情。我們需要誠實地想像各種墜落後的可能後果,而不是自以為會沒事。
先接受死傷的各種可能性,我們才有辦法真的進入狀況。有了這種了悟,才能下有效和適當的決定。當我們一但知道了接下來的可能結果,我們便可以做出反應。而這種反應可以有效地把墜落狀況,縮小在某種預期的範圍裡。

開始練習
練習墜落可以加強我們真正墜落時反應的能力。雖然說我們都準備好受傷,不過還是把這種機會減到最低。我們練習墜落的岩壁區域最好沒有任何突出地形,而且請做好絕對的確保措施。剛開始練習時可以選一面有些微外傾的岩壁來練習,以避免不必要的受傷。
當 經驗越來越多時,可以開始練習比較危險的墜落情形,像比較垂直的岩壁,或練習有點擺盪的墜落。整個系統裡的繩子長度要夠長,我們和確保者之間的繩子長度最 少最少要有50英尺,以便分散地吸收墜落時的力道。繩子在練習墜落期間會延展或扭曲,所以在幾次的墜落之後,應該把繩子抽下來並好好整理一下,讓它回復原 本的長度與形狀。

如果你在墜落方面是個新手,那可以用漸進的方式來練習。先試試toprope的方式。先習慣吊在半空中的感覺,反覆踏著 岩壁或在岩壁上來回小跑步也不錯。之後讓確保者別把繩子帶太緊,讓繩子有點鬆鬆的,然後往上爬幾個動作之後練習墜落一下。接下來可以開始練習先鋒墜落,前 幾次可以練習在bolt附近墜落,之後往上多加一個動作或多加兩個動作再墜落。要一點一點增加先鋒墜落的距離。

練習墜落時身體要保持適當 的姿勢,適當的姿勢包括手肘和膝蓋要微彎,並讓手大概維持在胸前的位置,以便應付可能的撞擊。當然別抓繩子。自然的落下比彈跳出岩壁要好得多,因為這樣可 以避免撞回岩壁。慢慢摸索自己的呼吸與自我放鬆的方法。如果還是無法自然呼吸或還是一樣緊張,那就別急著去增加墜落距離。練習會擺盪的墜落時,要注意繩子 與腳的相對位置。如果bolt很單純地在正下方,那繩子要在雙腳之間。如果bolt在左右,那繩子必須在雙腳外面。剩下的便是好好飛吧。


Tech Tip - Sport - The basics of falling


Author: Arno Ilgner
Illustration: Mike Clelland
Source: Climbing Magazine

Falling is part of the climbing process. A hold breaks, we slip, pump out, and we’re off. It’s important to find appropriate ways to practice falling so we learn to do it safely.

Embrace. When we fall, intentionally or otherwise, we risk injury or death. To embrace the situation we need to be fully aware of everything that could happen. We need to honestly assess all the possible outcomes rather than block them out. By accepting the possibilities — death, injury, or no injury — we become fully aware of what we are getting ourselves into. This awareness is critical for effective and appropriate decision-making. Once we are conscious of all the possible outcomes, we can make effective, appropriate decisions that limit the kinds of fall consequences we engage.

Engage. By practicing falling we improve our ability to respond to a fall. Even though we want to embrace the possibility of injury, we want to minimize the chance of that outcome.
Your fall practice zone should be free of any protruding ledges and should have bomber protection. In the beginning of your practice, choose a fall zone that is slightly overhanging to help reduce the possibility of injury. Then, as you gain experience, you can practice more hazardous falling situations, such as those on vertical rock or with slightly swinging falls. Have plenty of rope in the system — at least 50 feet of rope between you and your belayer — to absorb the fall force. The rope will stretch during your practice session, so, after a few falls, lower off and let the rope regain its shape and length.

If you’re new to falling, engage it gradually. Begin on toprope. Get used to the feeling of hanging on the rope, perhaps “running” or “pedaling” back and forth across the rock. Then, tell your belayer to leave some slack in the rope while you climb up a few moves and take a fall. Next, try practicing your lead falls. Begin by simply letting go right by the bolt. Then, climb a move or two above the bolt and take a fall. Increase your fall distance in small increments.
Maintain proper form as you practice falling. Proper form includes keeping your arms and legs slightly bent with your arms out in front at chest height so you can respond to potential impact. Don’t grab the rope. Step off gently rather than jumping out and back, which can cause you to slam into the wall. Pay attention to your breathing and how relaxed you feel. If you are holding your breath and feeling tense, then you need more practice before progressing to the next increment.

When taking diagonal falls, pay attention to the rope in relation to your feet. If you are directly above the bolt, then the rope needs to be between your feet. If you are to the right or left of the bolt, then the rope needs to be outside of your feet. Enjoy your flight!


2008年5月30日 星期五

如何安全的做先鋒撒退 - How to Safely Clean Anchors

 如何安全的做先鋒撒退(先給需要的人參考,有機會再翻譯)
*本文僅供參考, 該操作具危險性, 需要經過教練指導以熟悉各種重要注意事項


Better Beta
How to Safely Clean Anchors - Part 1


Threading and cleaning the anchors on a sport climb is dangerous. Unfortunately, most methods are complicated and require more effort than redpointing the route! Systems like double daisy chains, long girth hitched slings and extra locking biners often result in a rat's nest rivaling a big wall belay. The simplest solutions, however, are often the best. For your latest project, consider using this version of a Petzl recommended method:

1. Clip each anchor with a quickdraw and ensure that the biner gates are opposed.

2. Clip the lead rope into the anchor draws.

3. Have your belayer take you tight and sit back on the rope and anchors.

4. Take a spare quickdraw and clip it into your belay loop.

5. Grab one of the anchor draws and pull yourself up to clip the quickdraw from your belay loop into the bottom biners of the anchor quickdraws.

6. You are now no longer weighting the rope and are directly clipped to the anchors. Make sure that your belayer keeps you on belay, but with less tension.

7. Ask for slack from your belayer. Stay on belay.

8. Reach down and take a bight of rope that you will push through both anchor rings.
Note: Quickdraws on the anchors have been omitted in the diagram for clarity.

9. Once through both rings, continue to pull slack in the bight of rope and tie an overhand figure-8 knot.

10. Take a small locking biner and clip this overhand figure-8 knot directly into your belay loop. Make sure you lock the biner.
Note: Quickdraws on the anchors have been omitted in the diagram for clarity.

11. Double check with your belayer that you are still on belay and proceed to untie the rope from your tie in point on your harness.

12. Pull this tail of rope through the anchor rings.
Note: Quickdraws on the anchors have been omitted in the diagram for clarity.

13. Ask for tension from your belayer and unclip from the anchors.

14. Lower safely to the ground.

In the next issue we will explain how to thread and clean sport climbing anchors that are too small to allow a bight of rope to be threaded.


Better Beta
How to Safely Clean Anchors – Part 2


In the first part of this series (Oct. 2006) we discussed cleaning sport route anchors equipped with ring anchors. The process involved pushing a bight of rope through the rings, tying a figure eight knot on the bight and clipping it into your belay loop with a locking biner (see Gripped e-Mag Issue 1, October 2006). When you encounter chain anchors however, the links may be too small to pass a bight of rope. In these cases consider using the following cleaning sequence.

1. Clip a quickdraw into each length of chain above the last chain link. Make sure you clip the draws with the bottom biner gates opposed.

2. Clip the lead rope into the anchor draws.

3. Have your belayer take you tight and sit back on the rope and anchors.

4. Take a spare quickdraw and clip it into your belay loop.

5. Grab one of the anchor draws and pull yourself up to clip your belay loop draw into the bottom biner of one of the anchor quickdraws.

6. You are now no longer weighting the rope and are directly clipped to the anchors. Make sure that your belayer keeps you on belay, but with less tension.

7. Ask for slack from your belayer. Stay on belay.

8. Reach down and take a large bight of rope. Tie a figure eight knot on a bight and clip the knot into the top biner of one of the draws already clipped into the chains. This prevents the rope from being dropped during the next sequence.


9. Untie the rope from your harness and pull it out of the anchor draws.

10. Thread the free end of the rope (previously attached to your harness) through the free bottom links on the two sections of chain.

11. Tie back into your harness.


12. Unclip and untie the figure eight knot from the top biner on the anchor draw.

13. Double check that you are still on belay and then ask your belayer for tension.

14. Unclip your belay loop draw from the two quick draws in the chains. You’ll now be sitting back the rope.

15. Remove the two draws from the anchor chains.


16. Lower safely to the ground.


你應該知道的5種繩索垂降技術 (Five rappelling techniques you should know)

各位學長學弟妹們辛苦了, 特請辣妹為各位示範解說, 分享普羅大眾.

你應該知道的5種繩索垂降技術
- Five rappelling techniques you should know

2008年5月25日 星期日

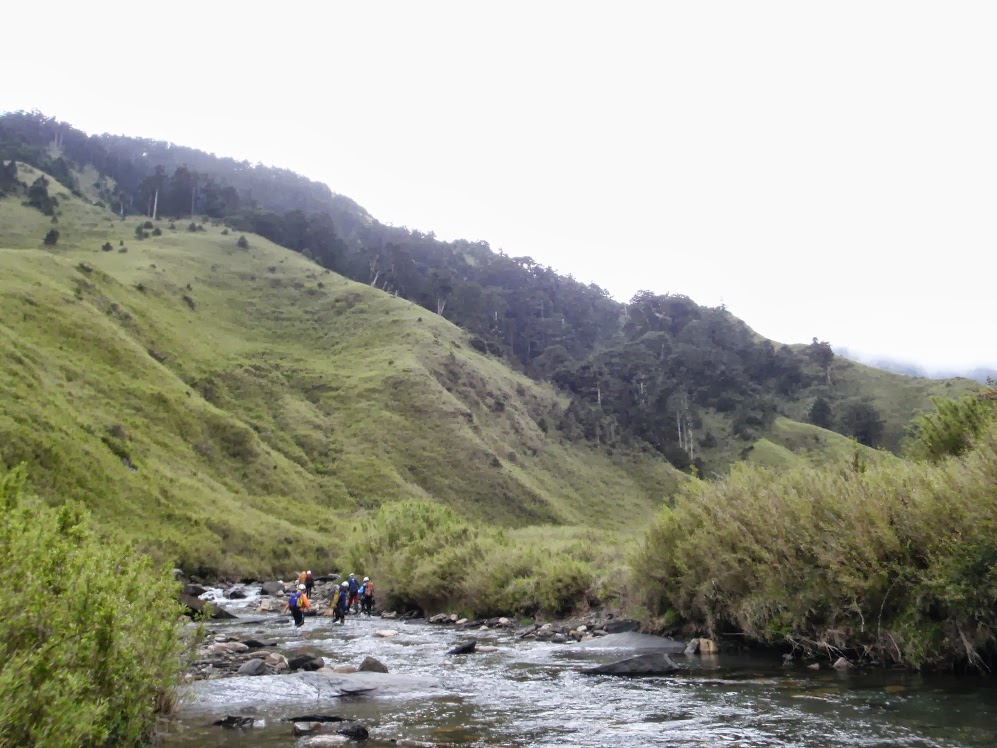
合歡溪O型溯源 (小風口下溯-上溯寒訓中心) (二日) - 2008/05/24~25

合歡溪O型溯源(小風口下溯-上溯寒訓中心) - 2008/05/24~25

日期
: 2009/05/01~02
團體: 四季溯溪
領隊: 王廷元
隊員: 李宙湘、陳筱婷、王曉瑜、江芳諭、陳永勝、鄭宗明、林俊豪、林萬和

宗明相簿 (點圖播放)


阿豪相簿 (點圖播放)